

How To Draw Automation In Ableton
The audio of synthesis is the sound of controls being moved. Sometimes that move occurs past human hand. Other times, information technology's the upshot of automation. Automatic movement comes as a result of controls that are drawn in via a DAW's tools, captured from live inputs or programmed in some other way. At that place was a time when expensive mixing desks or control surfaces with motorised faders were required to implement automation. Today, nevertheless, at that place are many more than options, some of them far more than attainable and affordable than the market's £twenty,000 32-channel units.
In Live, automation runs deep, encompassing everything from Follow Deportment, which can exist used to trigger sound clips, to LFOs, whose waveforms tin can exist applied to lend move to controls in instruments and effects. In this tutorial, our focus is on automation envelopes. This is a relatively autonomous feature; you won't need any fancy equipment for these eighteen steps. Ableton's DAW is incredibly automation-friendly. Almost everything tin be assigned via MIDI Map Mode. By entering the key-map mode, the calculator keyboard in lowercase or majuscule can be used equally a virtual-hardware controller too.
Motion with the times
In terms of Live'due south Session View clips, automation is available for audio and MIDI tracks. For audio tracks, y'all'll see controls for the mixer and any installed audio effects. With MIDI tracks, there are often more parameters, found within MIDI effects and software instruments. You may well end up with a lot of moving controls across a single rail. In Session View, you can't run into multiple automation envelopes.
You tin, however, in Organization View: printing A on your keyboard to view automation, then apply the + buttons below each runway name and add lanes. (Hopefully, Ableton will one day add a single-click function that'southward able to unfold and display all lanes at once.) In Live ten, you lot tin can right-click or control-click on automation points, select Enter Value, and type in your desired corporeality, which allows y'all to circumnavigate the frustrations of trying to brand precise adjustments by footling with the mouse.
Alive also offers users the ability to unlink envelopes, which separates the automation from the audio or MIDI prune, assuasive, for example, an automated reverb event to run on beyond the length of the prune it was initially applied to. This tin open up a whole new realm of automation-based madness. Every parameter that can be automated can run at a dissimilar length, including those longer and shorter than the host clip. If you're working with short loops, for example, this tin help minimise the repetition that comes with multiple carbon-copy delay sounds, past giving y'all the opportunity to modify the positions of their crescendos and tails.
Automation tin can take the class of straight lines or curves, and tin can also be used in a more blocky fashion. Equipping the pencil tool and hit B allows users to draw increments that follow the grid values. This can exist used, for instance, equally an alternative to LFOs, to add together rhythmic value to clip-parameter changes. A canny technique involves drawing in automation sequences using the pencil, tapping B again to switch the function off, and then deleting some of the drawn-in points to create upwards or downwards sweeps amid the regular square-edged changes.
Copycat
In that location's more merriment to be found when you copy envelopes. You tin duplicate envelopes or sections of them so that item automation movements are repeated throughout a clip. You can also paste movements into other clips, which is a massive time-saver. More fascinating still is that you're able to paste your copied envelopes into dissimilar parameters. Why not pluck out your carefully sculpted flanger effect's envelope and paste it into the chorus applied to another clip just to see what happens? Every bit well every bit drawing in automation via the pencil, it tin can be recorded via mouse movements or a controller. Ableton'southward Push hardware controller can fifty-fifty do step-sequence automation.
Some hardware synths can exist configured to send MIDI from their knobs, meaning they can pull duty as controllers too. Click the tape button at the top of the screen, arm your rails, then get-go Live running and motion your intended controls. If you keep moving as your clip loops, your movements will overwrite the previous take. If you've mapped anything using the key-map manner, those movements (which volition basically be on/off) are also recorded every bit automation.
Recording command movements manually will usually upshot in looser and less-machine-like automation than the drawn-in variety. But at that place'south no reason y'all couldn't combine the two techniques. A helpful hidden tool to recall when it comes to recorded envelopes is the Simplify Envelope feature found in the Context Carte. This can remove wayward points from the recorded envelope without changing the form of the automation.
Automation can be practical to anything, from simple runway-level adjustments that run through a mix to complex and ever-evolving synth-parameter changes. If you create a MIDI prune that doesn't have any notes, it can however contain envelopes that'll affect your instrument and effects parameters as you play notes from a keyboard in real time. It can likewise be sent out via your MIDI interface or USB to connected synth hardware. There are many avenues down which you can take automation, all of them ripe for experimentation. Here, we'll innovate you to only some of them.
Understanding automation in Ableton Live 10: step-by-pace
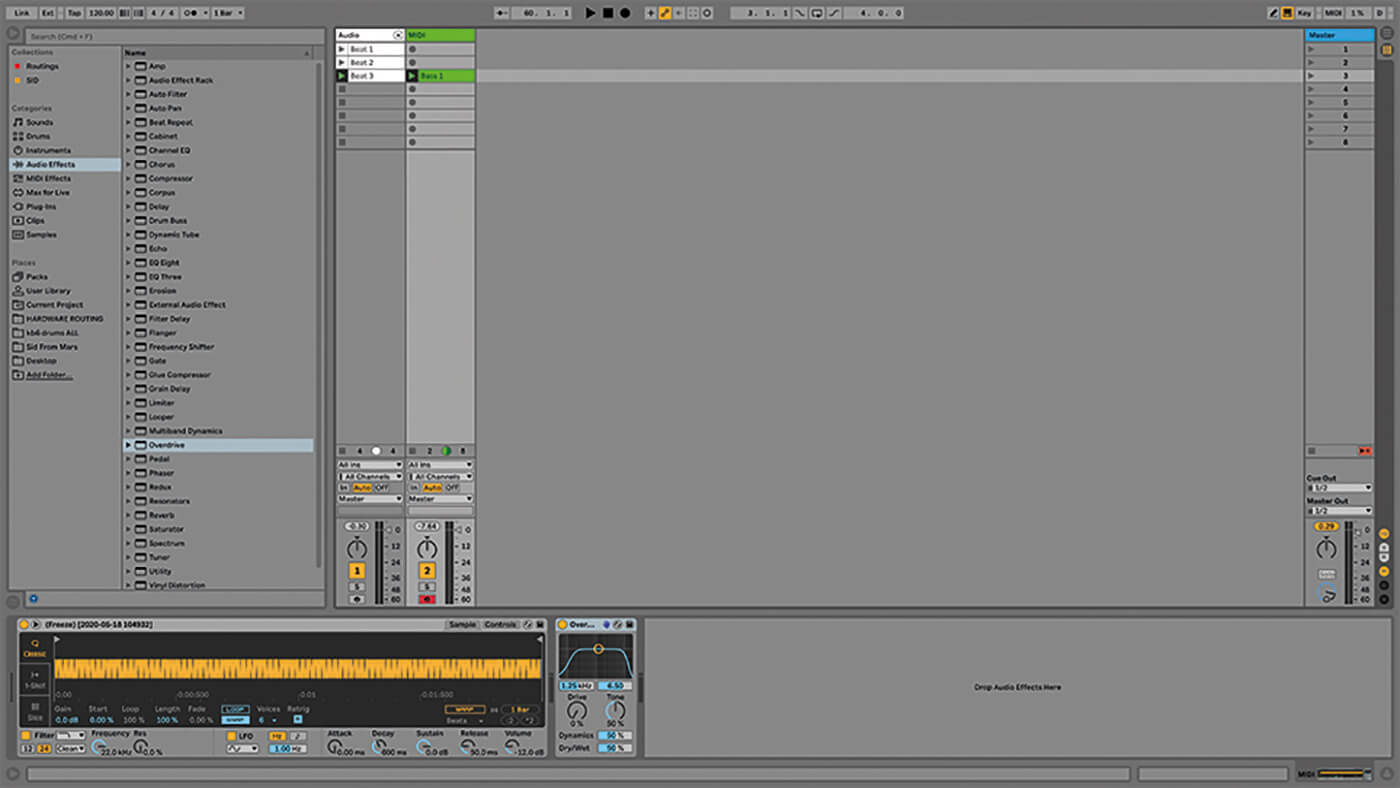
1. We've provided an example Live 10 ready, in which yous'll find loaded a Simpler sample instrument preset, some audio clips and some audio furnishings. In that location should be more enough automation opportunities here. If y'all don't accept Live ten, download the demo or use any version you practise take.
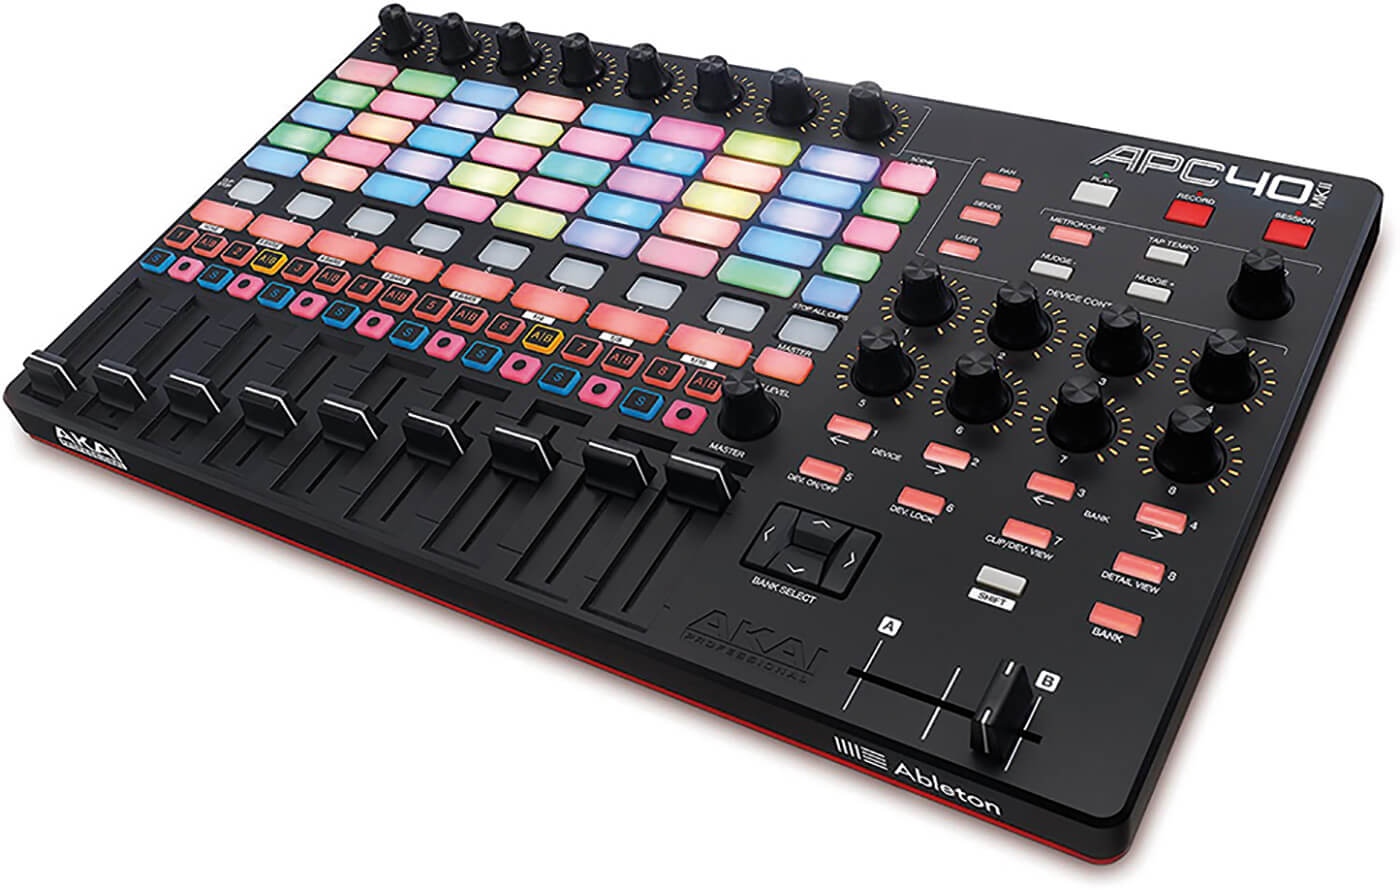
ii. Though you tin can consummate the majority of this tutorial without one, connect a MIDI hardware controller if you have one. This connection will most probable be via USB but there are many swell control apps for mobile devices that tin can connect wirelessly.
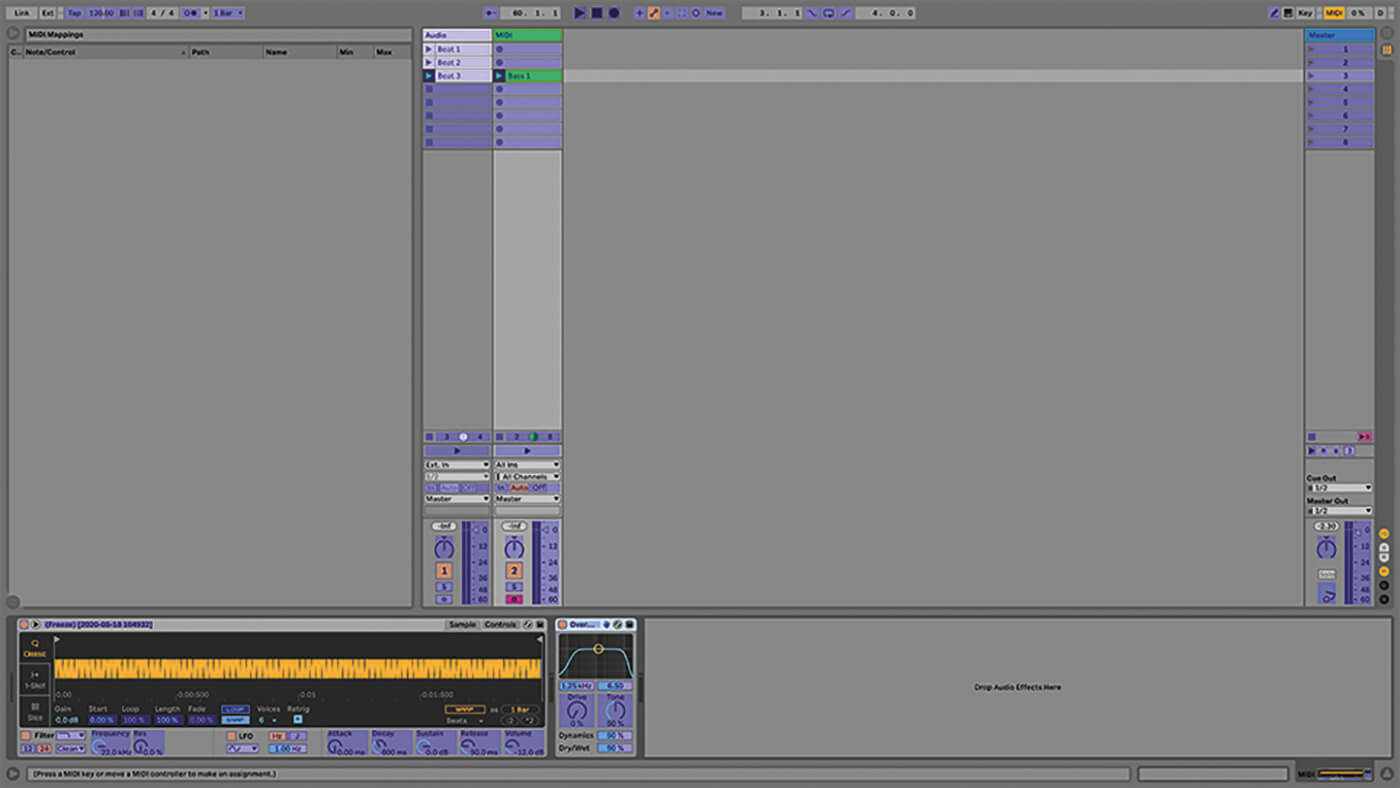
three. You can automate almost everything. See for yourself. Hit Cmd+One thousand to enter MIDI Map Mode. Here, everything highlighted blue can be controlled by hardware knobs and faders or via automation envelopes.
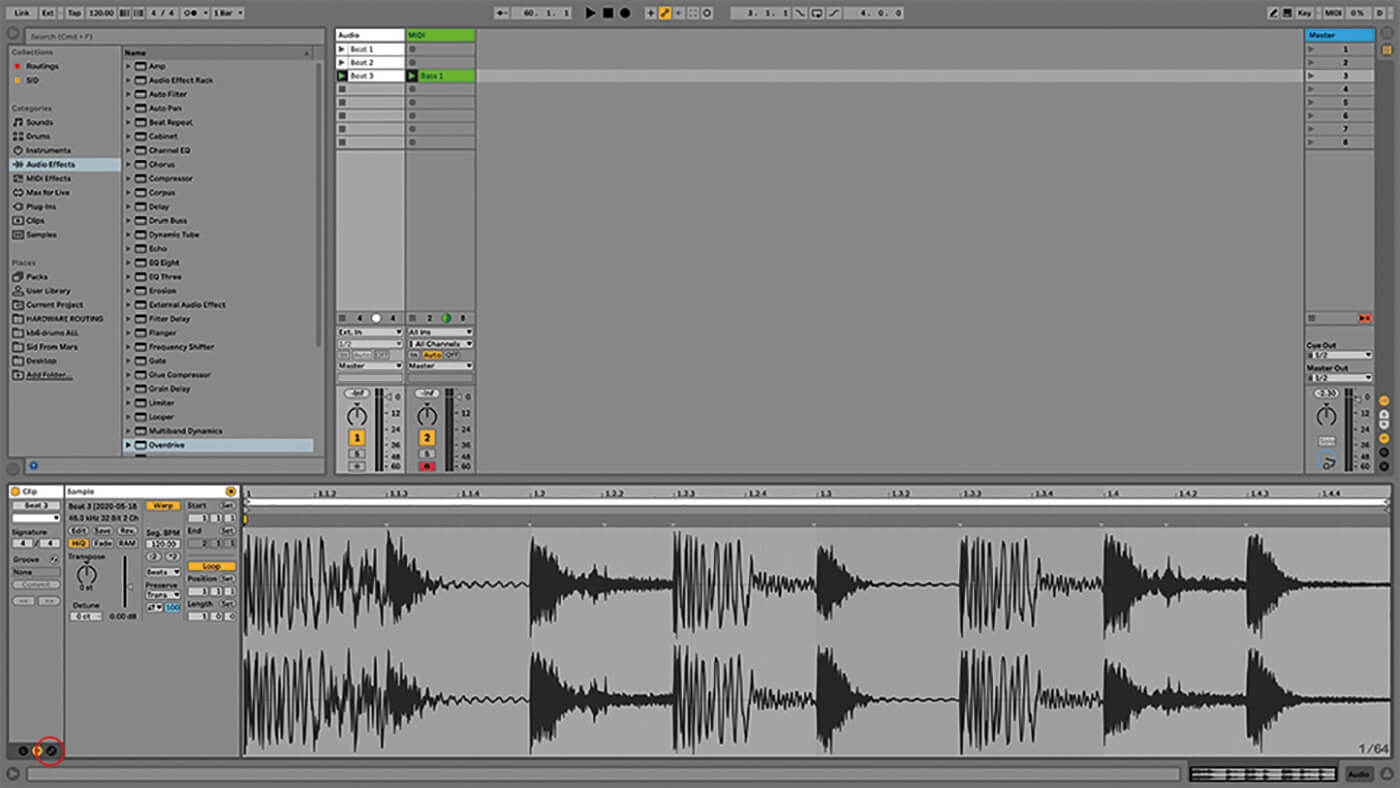
iv. Start with something simple. Double-click the audio clip Beats one. Yous can see the waveform below the Session View. Down at the lesser left of the screen, you lot'll meet three pocket-size buttons. Click on the right-most push button, with the link icon.
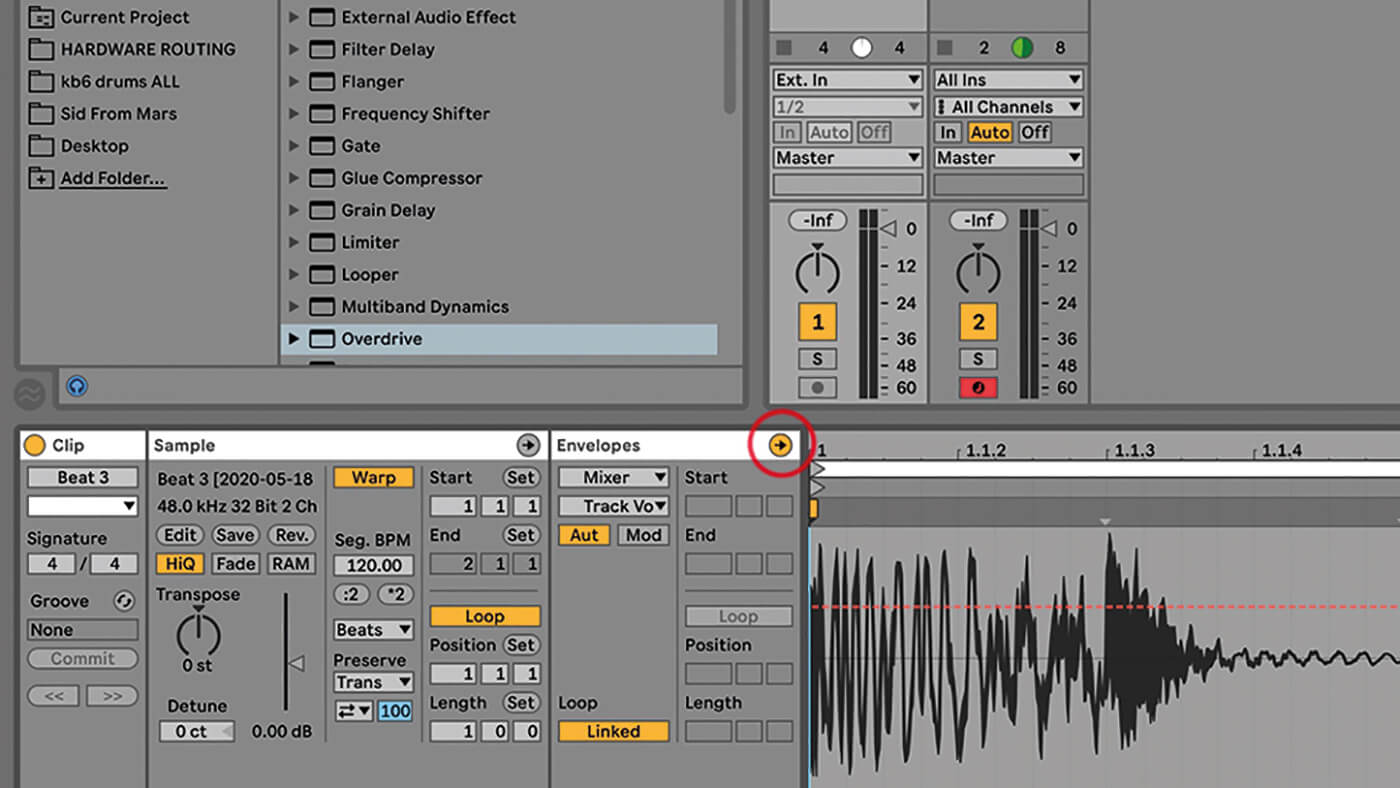
v. Now you'll see the Envelopes box. When you're switching between the sample editor and envelope editor, exist certain to click on the arrow for the appropriate box, otherwise you'll be trying to edit the wrong thing. Click on the chooser nether the word Envelopes.
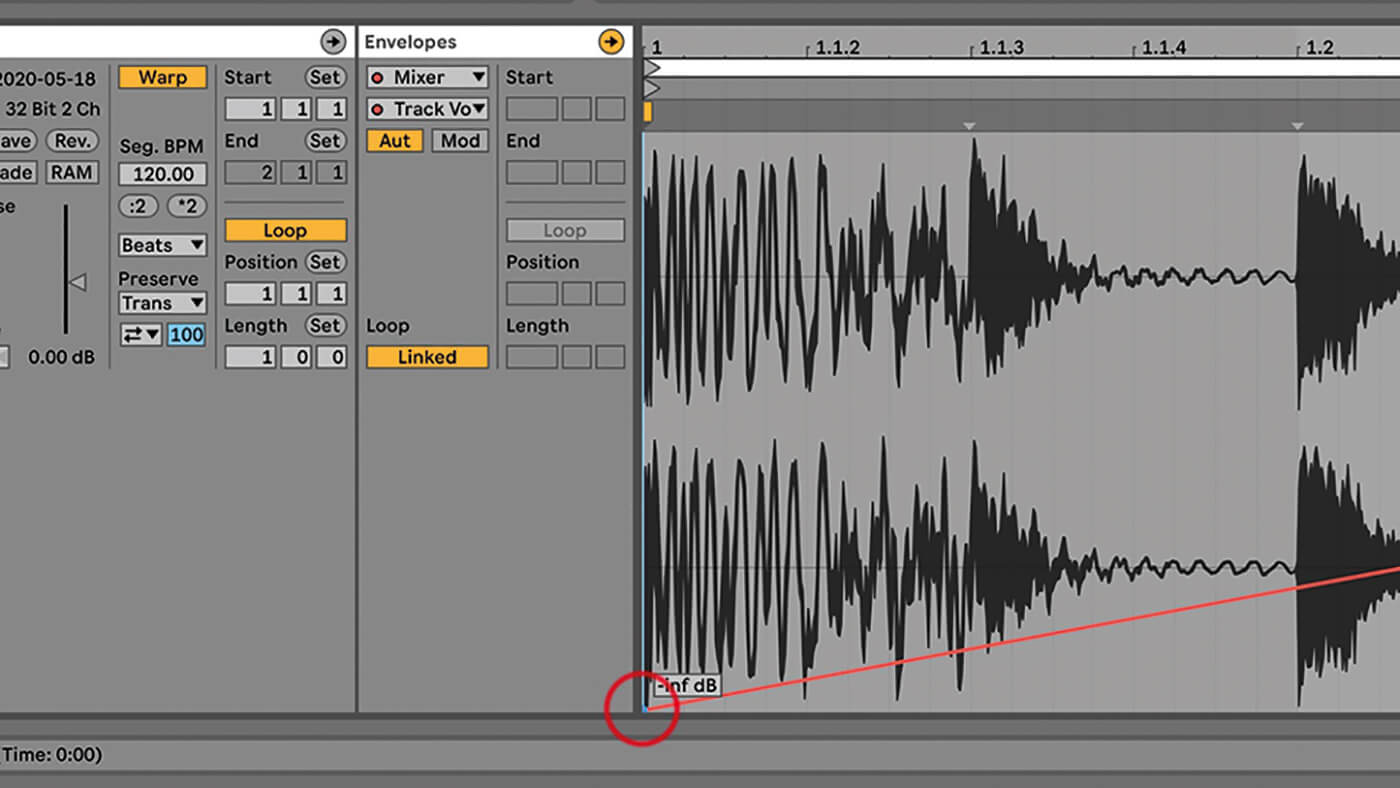
6. From here, choose Mixer from the tiptop box, and Track Volume beneath. Go to the left of the dotted red line and click once. Do the aforementioned at the correct and you should have a solid line of automation. Drag the left terminate downwards until it says -inf dB.
![]()
QUICK ON THE DRAW Some adopt to draw in their automation envelopes. It's slower but cleaner and tin can be an absorbing activity in its own right. It sounds different also. Totally smoothen car-similar fades are not the same as a recorded movements played freehand, which volition be less precise and sport many more than steps.
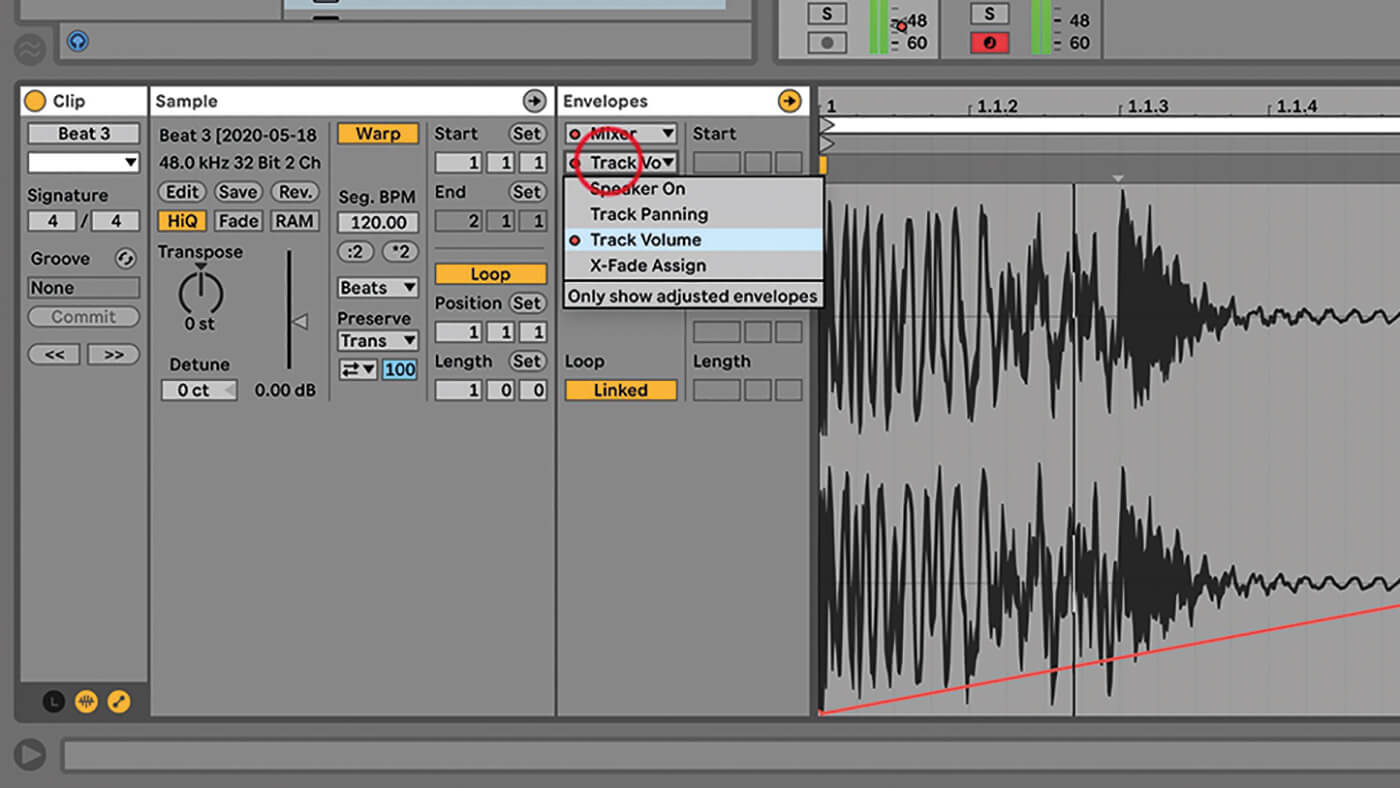
vii. Launch that clip and, every bit it loops circular, the track's book fader will go up and downwards. The fader now has a red dot, which is to show that automation is practical to it. Go dorsum to the choosers and see what other parameters are available.
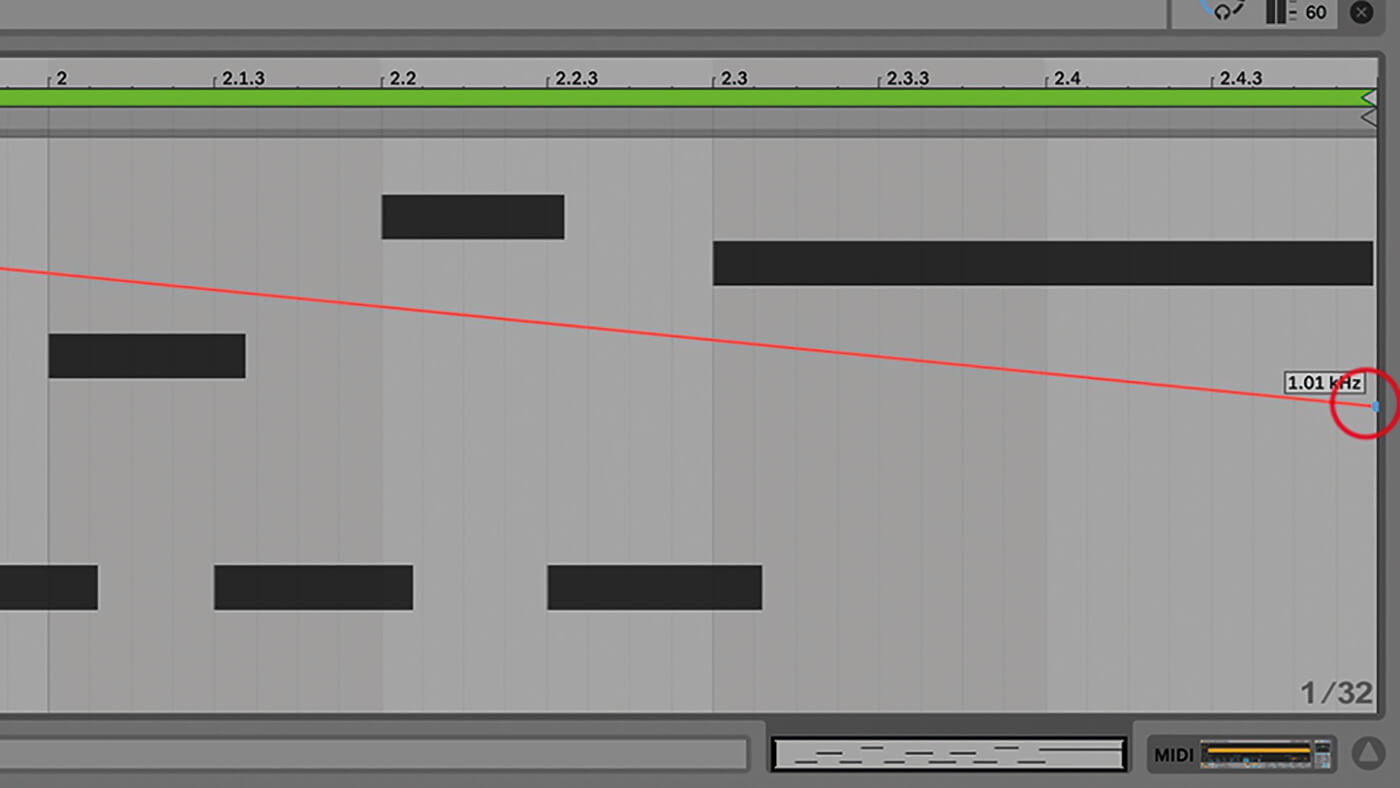
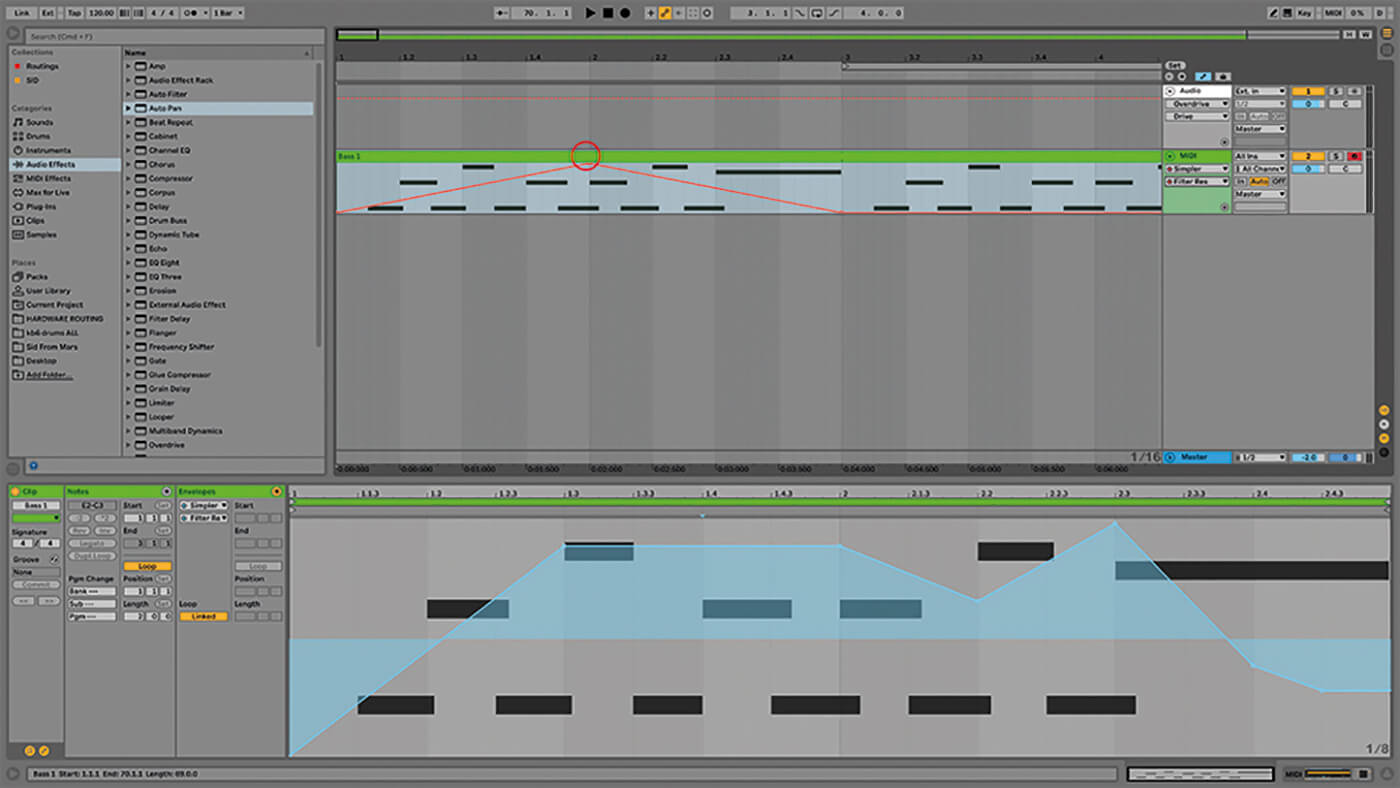
8. Go to the MIDI rail and the Bass 3 clip. Become into the envelope editor but, this fourth dimension, choose Simpler from the top chooser and Filter Freq from the lower, then describe an envelope going from 22kHz to 1kHz.
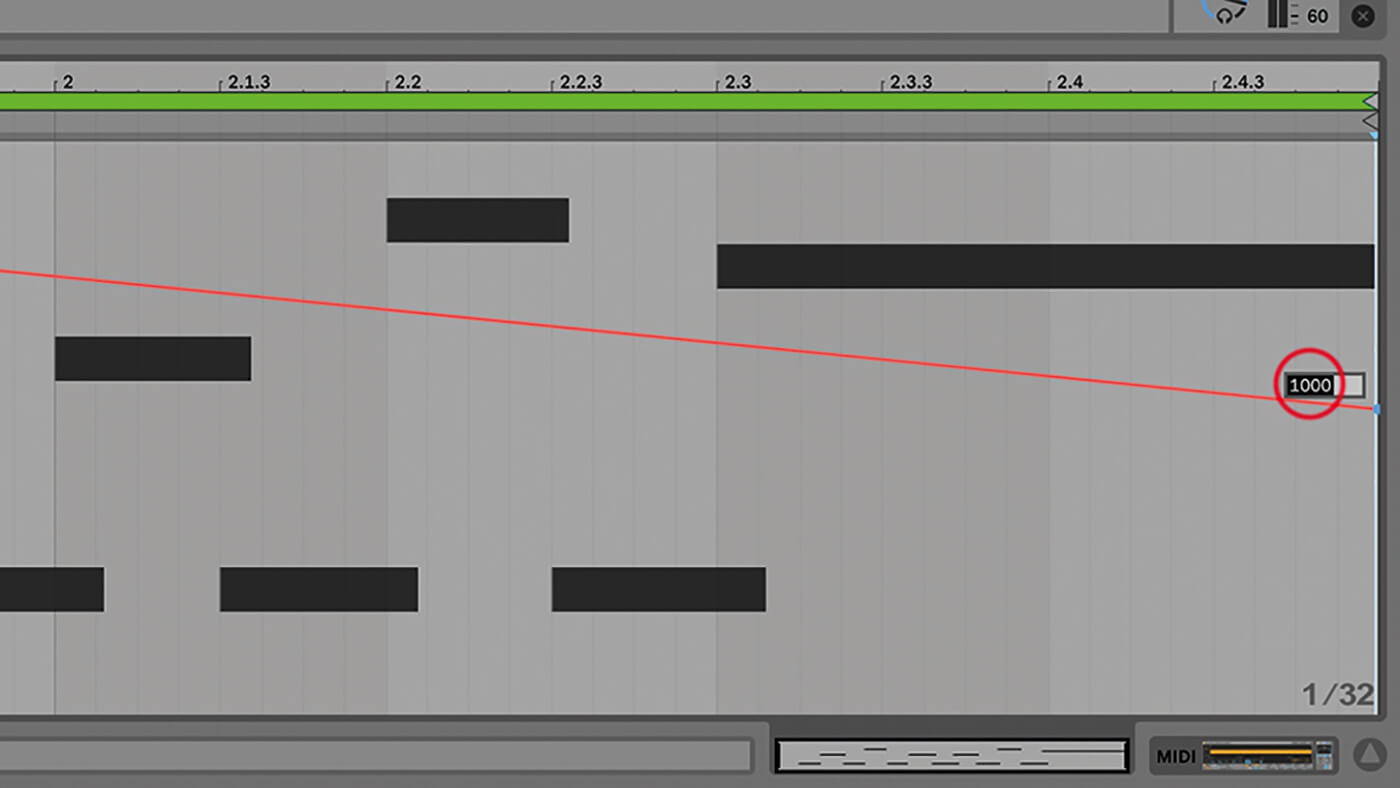
9. If you can't get the node to a precise value, correct-click and choose Enter Value from the top of the Context Menu, then blazon it in. Exercise the same with Filter Res and depict three points, at the start, middle and finish.

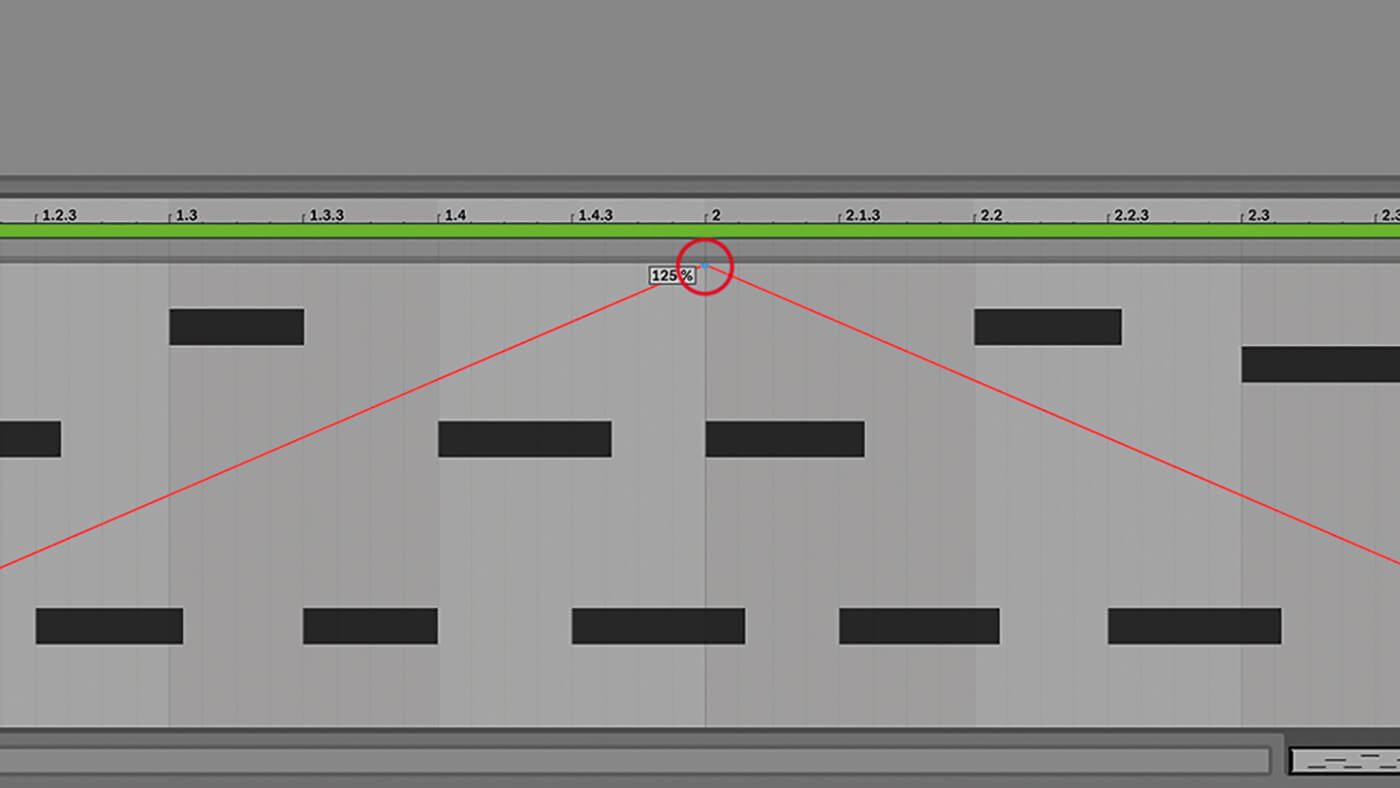
10. Drag the middle value to the top, 125 per cent. You tin can't view both lanes at in one case but you tin can see the controls moving on the Simpler device itself. There'south no limit to the number of envelopes y'all can have in a single clip.
11. Get back to the sound track and into the envelope editor and choosers. Choose Overdrive from the top and Dry out/Wet from the lower chooser. Draw an envelope rising from 0 and peaking at 100 per cent. This will loop.

12. You won't ever want that loop though, and so click Linked at the left of the envelopes box and type four in the new Length box that appears next to it. At present that same envelope will take identify over 4 bars.
![]()
THE HUMAN FACTOR In that location are many benefits to drawing in automation envelopes but sometimes tracks telephone call for that inimitable human touch. Push users can punch in and out of automation recording and playback. Here, automation becomes a fluid part of the performance.
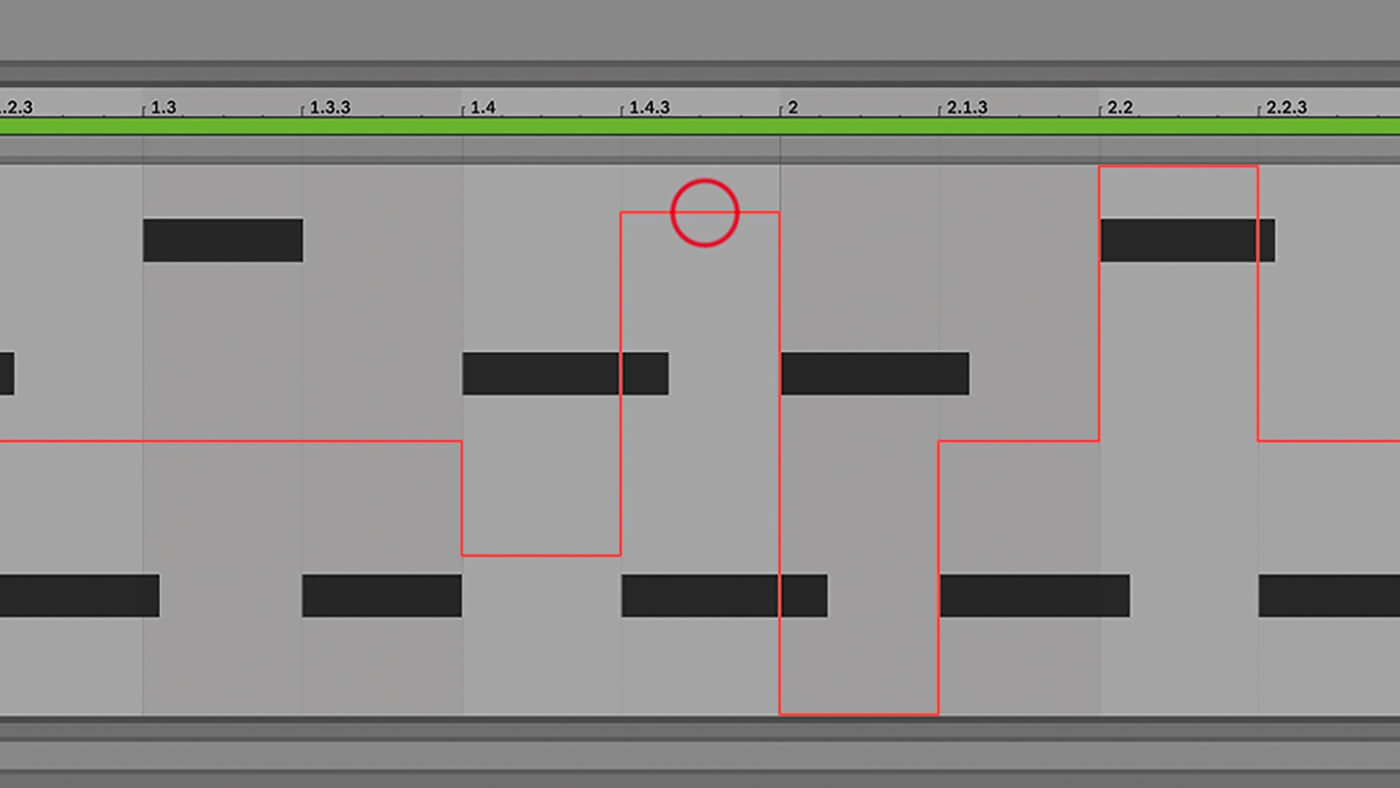
13. This applies to each private envelope, which adds a much more than evolving organic vibe to 1-bar loops. Try information technology with some other parameters. This might as well be good time to try pencil mode (B) and draw in some more blocky envelopes.

14. Envelopes can be edited after they're drawn or played in. Click on whatsoever existing point to remove it or click elsewhere on the line to insert a new point. Hover over a point and it'll be highlighted for repositioning.
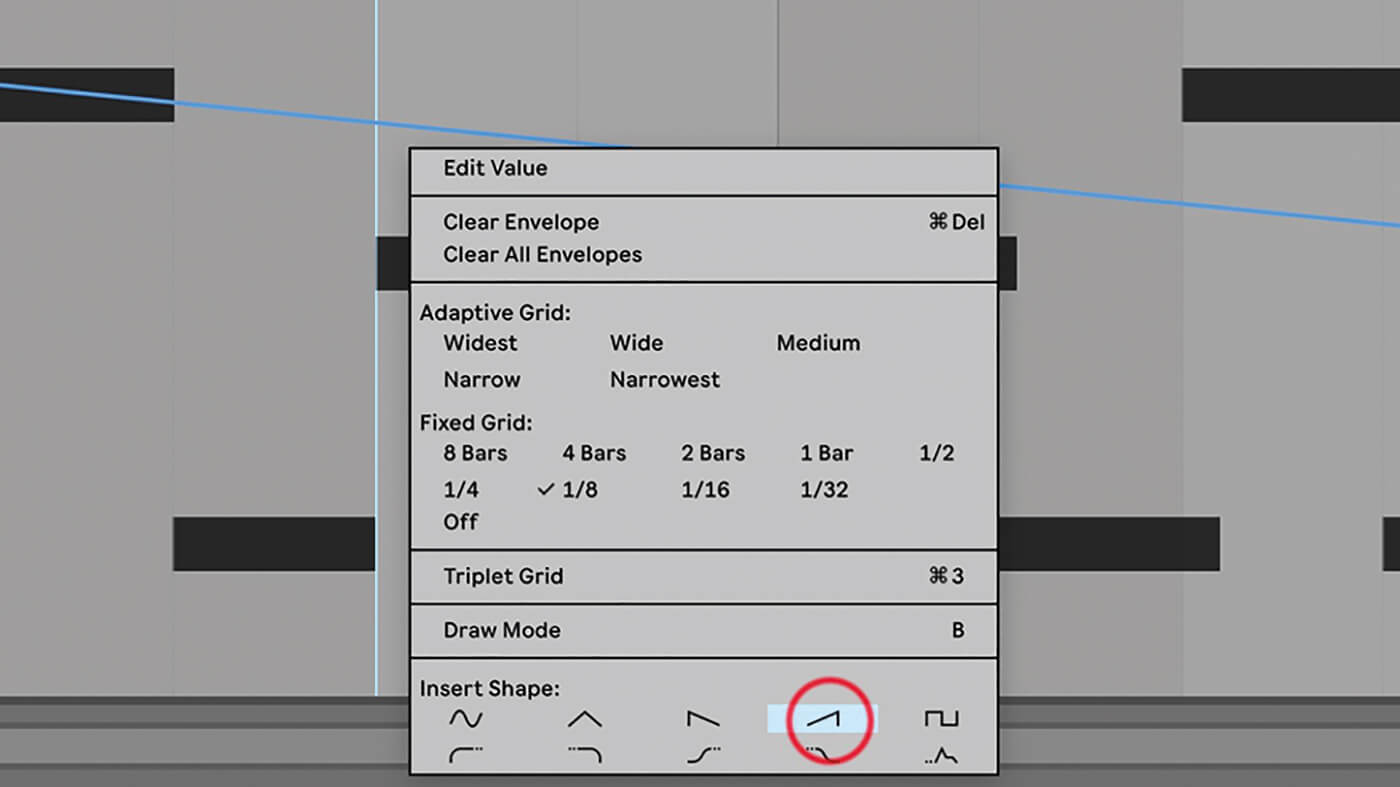
xv. Correct-click on an automation point to run across Context Menu options that let you to edit value, articulate all, and insert shapes. The latter allows you to choose from a ready of preconfigured envelopes. Adding these will replace the nearest section, not the unabridged envelope.
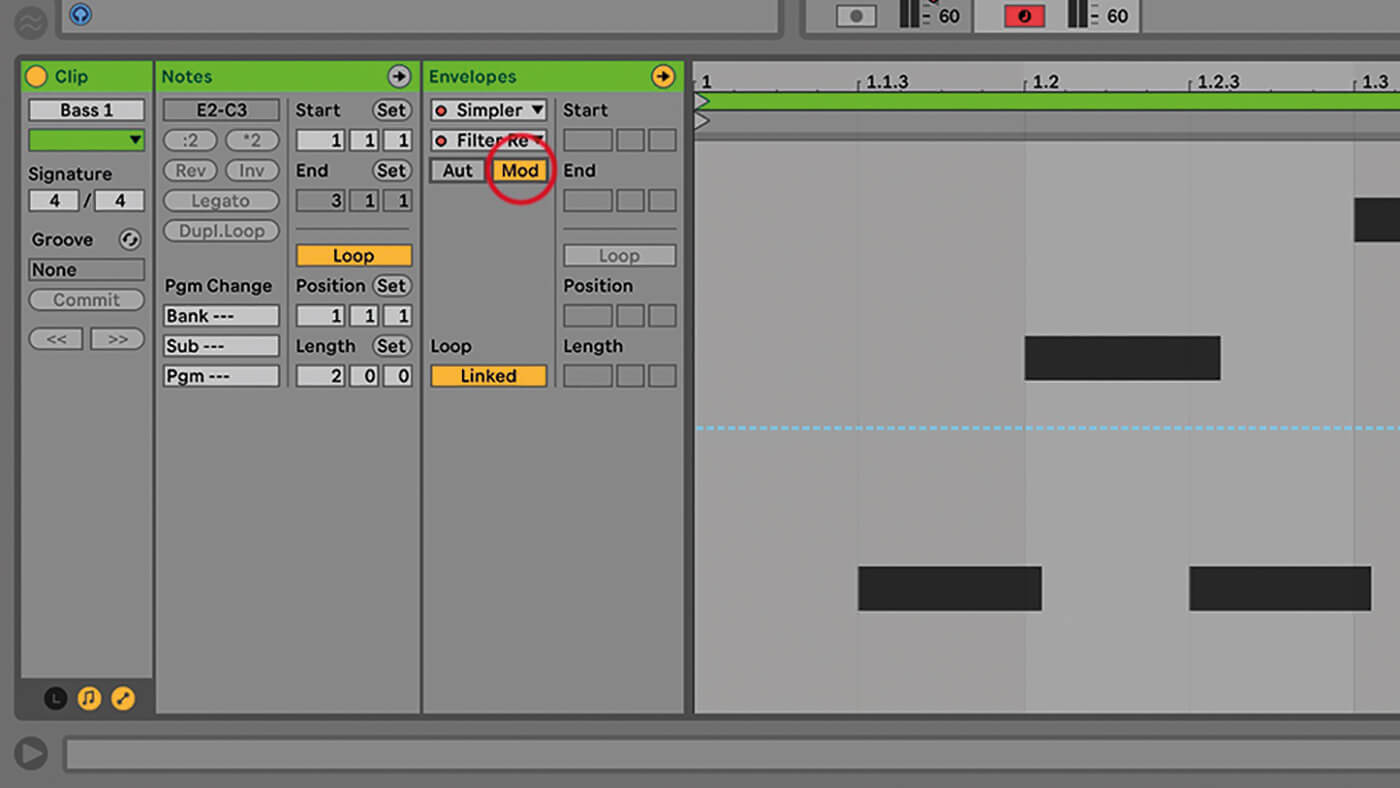
xvi. For any envelope that isn't simply an on/off office, you'll observe that buttons labelled Aut and Modernistic appear in the Envelopes box. The blue Modulation envelopes reflect a temporary starting time from the value defined by the red automation.

17. Endeavor it with the filter resonance automated earlier. You lot now have two envelopes to deal with for the same parameter, and if yous expect at the instrument yous'll run into a red and a bluish dot, and ii simultaneous movements on the Res knob.
xviii. If yous motion a clip between views, your automation will exist included, then you don't have to first all over again. You tin can only run into Modulation envelopes in the clip'due south envelope editor though, and the crimson envelopes in the track itself.
For more Live workshops, check here.

Source: https://musictech.com/tutorials/ableton-live/understanding-automation-in-ableton-live-10/
Posted by: gonzalezwhoustinity.blogspot.com
0 Response to "How To Draw Automation In Ableton"
Post a Comment